
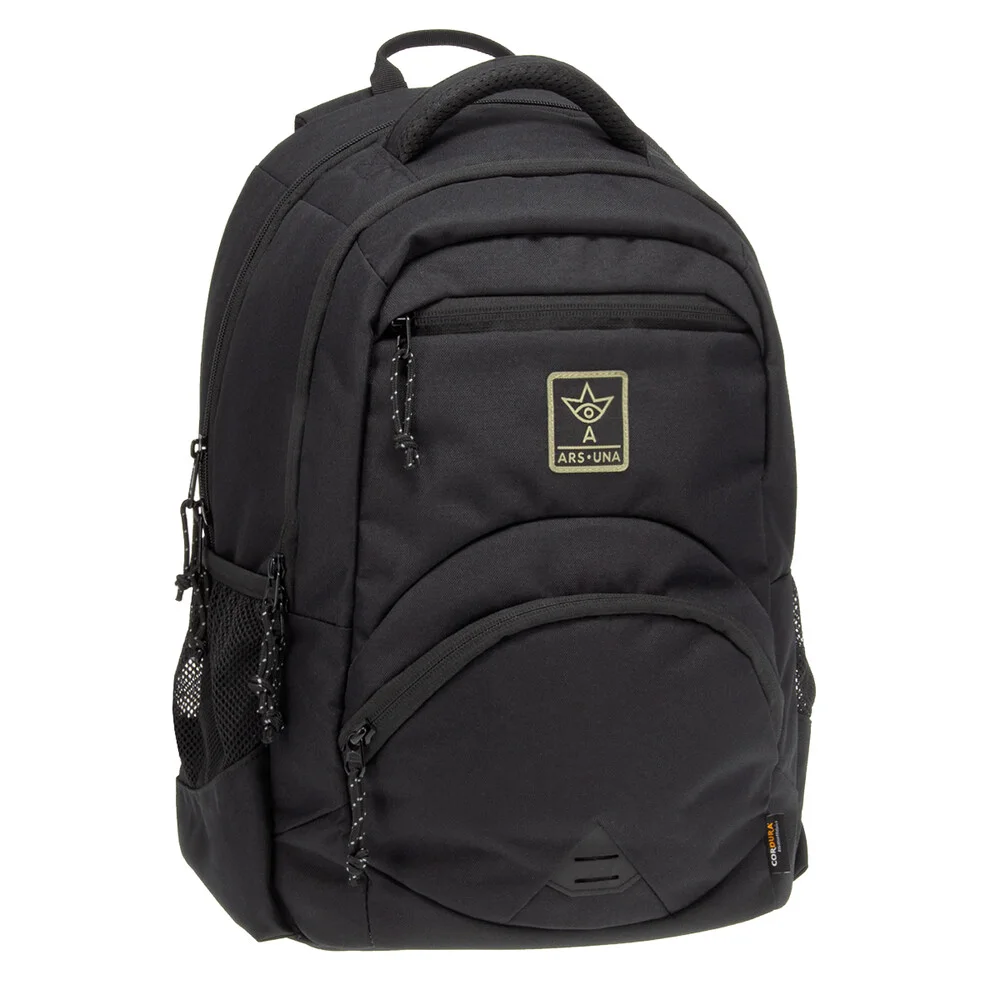
A woven label can look correct on a supplier card and still sit badly on a finished school backpack. A fold can hide a letter. A stitch line can crowd the border. A small projecting edge can catch a hand reaching into a pocket.
Approve the label as a sewn detail, not just a logo. The useful development record connects artwork, finished dimensions, folds, attachment and the actual location on the bag. It should also make clear which version purchasing must order.
01
Give each label a job and a location
Separate the exterior brand label from interior identification or product-information labels. They may need different materials, sizes and attachment choices. This article concerns brand-label development; it is not a checklist of mandatory labeling requirements for a particular market.
Mark the proposed location on a drawing and an assembled sample. Identify whether the label sits on a flat panel, crosses a seam or projects from an edge. Note which surfaces a user can touch and whether the label may interfere with opening a compartment.
For a student backpack, review the label with the normal packing sequence. Place books and other intended contents in the bag, then open the relevant pockets. The point is to inspect access around the detail, not to infer safety or durability from appearance alone.
Keep the location reference in the bag technical pack. A picture showing roughly where the logo goes is useful context, but production also needs a clear alignment reference and the agreed finished position.
02
Review the artwork at its real size
Ask for an actual-size sample, not only an enlarged digital proof. Examine the smallest lettering, border spacing and any fine symbol. If an element is hard to distinguish, discuss a specific artwork revision with the brand owner rather than allowing an unrecorded supplier simplification.
A woven result is a physical interpretation of artwork. Review the proposed yarn colors and visual effect against the intended shell fabric. A label that looks balanced on white paper can look quite different beside a textured or patterned panel.
Avery Dennison’s permanent-branding overview describes multiple yarns, effects and application techniques for woven labels. That variety is a reason to request a specific construction sample instead of approving only the word “woven” on a trim list.
Retain the approved physical sample with its artwork revision and supplier reference. Photographs can document the position and version, but should not be the sole color or texture reference. Record whether the buyer has approved the sample itself or merely approved further development.
03
Account for folds and the sewing area
Specify both the supplied label dimensions and the visible area after installation. For a folded label, show the intended fold lines and the portions that enter the seam. For a face-mounted label, identify the sewing border and its relationship to the artwork.
Work backward from the finished appearance. If a word sits too close to the intended stitch line, moving the stitch outward may not solve the problem on a narrow label. The supplier may need to revise the border, artwork scale or construction before the next sample.
Review corners and ends in the installed condition. Check whether the agreed folds remain in position during sewing and whether any unfinished edge remains accessible. Ask the trim supplier and sample room to resolve the detail together rather than sending separate, conflicting instructions.
A label approval needs two views: the loose trim with its fold references, and the same trim installed on the intended panel. Neither view replaces the other.
04
Check the edge where people actually touch it
Reach into the pocket, grasp the handle and adjust the nearby strap as applicable to the label position. Check for a projecting corner or rough edge in those movements. Describe the contact location precisely so the next sample addresses the cause.
Do not assume that a soft-feeling loose label will feel the same after folding and stitching. Nor does a neat front face tell you how the reverse has been finished. Inspect both sides where the construction permits access, including the label ends inside a seam.
If a problem appears, compare specific alternatives: a different fold, another location or an adjusted attachment detail. Change one clearly recorded feature at a time when possible. Otherwise the team may approve the result without knowing which version to reproduce.
Avoid broad claims such as scratch-free or child-safe based on this informal review. These handling checks identify development concerns; they do not replace any separately agreed testing or product-safety assessment.
05
Sew it onto the intended panel before approval
Use the actual shell, lining and backing combination at that location. A lightweight label sewn to a stiff panel presents a different development question from a folded label captured in a lined pocket seam. Record the assembled layers so the sample is repeatable.
Inspect whether the panel lies as intended after installation. If it draws up around the label, ask the sewing team to investigate the combination and setup. Avoid pulling the panel flat for approval photos and then discovering the distortion again on finished bags.
Check the reverse for unintended stitching through a pocket or another component. The label installation must fit the assembly sequence. Sewing a detail after a compartment closes may require a different access plan than attaching it to the flat cut panel.
Branding methods also need separate approvals. A woven label is not the same development problem as a logo stitched directly into the shell; our embroidery sampling article covers that alternative. Do not substitute between them without checking appearance and construction.
06
Keep the approved trim version through production
Assign a clear reference to the approved label, including artwork version, supplier reference, colorway and fold arrangement. Link it to the installed sample. When ordering trims, compare the purchase description against that record rather than relying on the latest attachment in an email chain.
At receipt, check the delivered labels against the approved reference before they enter production. If the border, dimensions or fold differs, isolate the question for review. Do not quietly compensate with a shifted stitch line that changes the visible design.
Review the first installed labels on completed bags and keep the result with the production record. A loose-trim inspection cannot detect a reversed orientation or a pocket accidentally caught during sewing. Inspect the installation as well as the purchased component.
Use the same sample revision process for later artwork changes. State whether old stock may still be used or must remain separate. Clear version control prevents mixed branding within a shipment without relying on everyone remembering a conversation.
FAQ
Questions buyers often ask
Is a digital logo proof enough to release woven labels?
No. Use it to approve artwork direction, then review a physical sample at actual size and an installed sample on the intended material stack before production release.
Should the label supplier choose the fold without a drawing?
Ask the supplier to propose a suitable fold, but confirm the finished visible area, seam allowance and installed orientation with the sample room and buyer. Record the accepted detail rather than leaving it implicit.
Discuss your bag development project
ANSON XIE
General Manager & Founder
Quanzhou Junkai Pengda Special Equipment Co., Ltd.
Email: ansonxie@jkpdtime.com
Phone: +86 177 5095 3355
WhatsApp: +86 177 5095 3355
Factory address: Floors 2–4, Building 1, Phase I, Huixin Intelligent Manufacturing Industrial Park, Hui'an County, Quanzhou, Fujian, China