
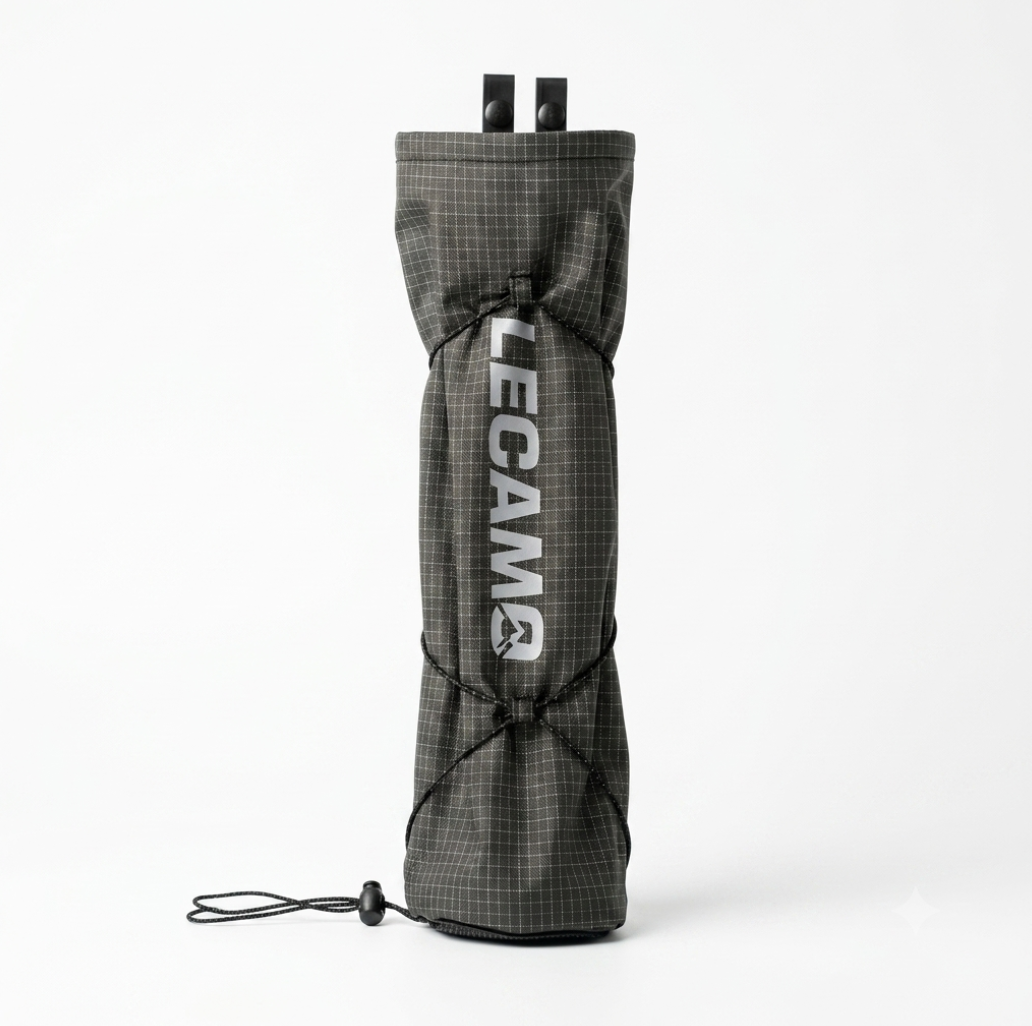
Develop a trail-running pole quiver as a system comprising the poles, sleeve, pack interface and wearer. Fitting folded poles into a sleeve answers only the storage question. Access, attachment and cleaning need separate decisions.
01
Which dimensions should define the storage space?
Start with the complete pole bundle in its intended stored condition. Folded length, grips, wrist straps, baskets and overlapping sections all influence the insertion path. A shaft diameter alone is not enough.
Provide the actual poles or clear measurement photographs and define their orientation. Successful insertion of one set does not establish compatibility with every folding or telescopic pole.
Salomon’s official Custom Quiver description identifies a structured opening and compression lace as separate design elements for access and stability. This is a description of that brand’s product. It illustrates separate design tasks and does not establish performance for the photographed quiver here.
02
How much shape should the opening retain?
The mouth needs a useful path for the pole bundle while allowing the empty sleeve to be stored and worn. A soft opening may need help from a second hand. A bulky or rigid edge may interfere with nearby clothing or movement. Resolve that trade-off with the actual poles and wearer.
Compare insertion and removal on a table before repeating them with the same assembly attached to the target pack. An off-body result cannot establish that the worn operation is equally easy.
A thinner sleeve is not automatically a better product. The opening, bottom contact zone and attachment tabs can have different jobs. Specify them separately rather than removing useful structure to reach a single empty-weight figure.
03
How should snap tabs fit the pack?
Confirm the shape and spacing of the target pack’s attachment points, then check whether the tabs can pass around them and close correctly. The close-up shows two snap tabs and the neighboring area. It does not reveal every hidden layer or establish connection strength.
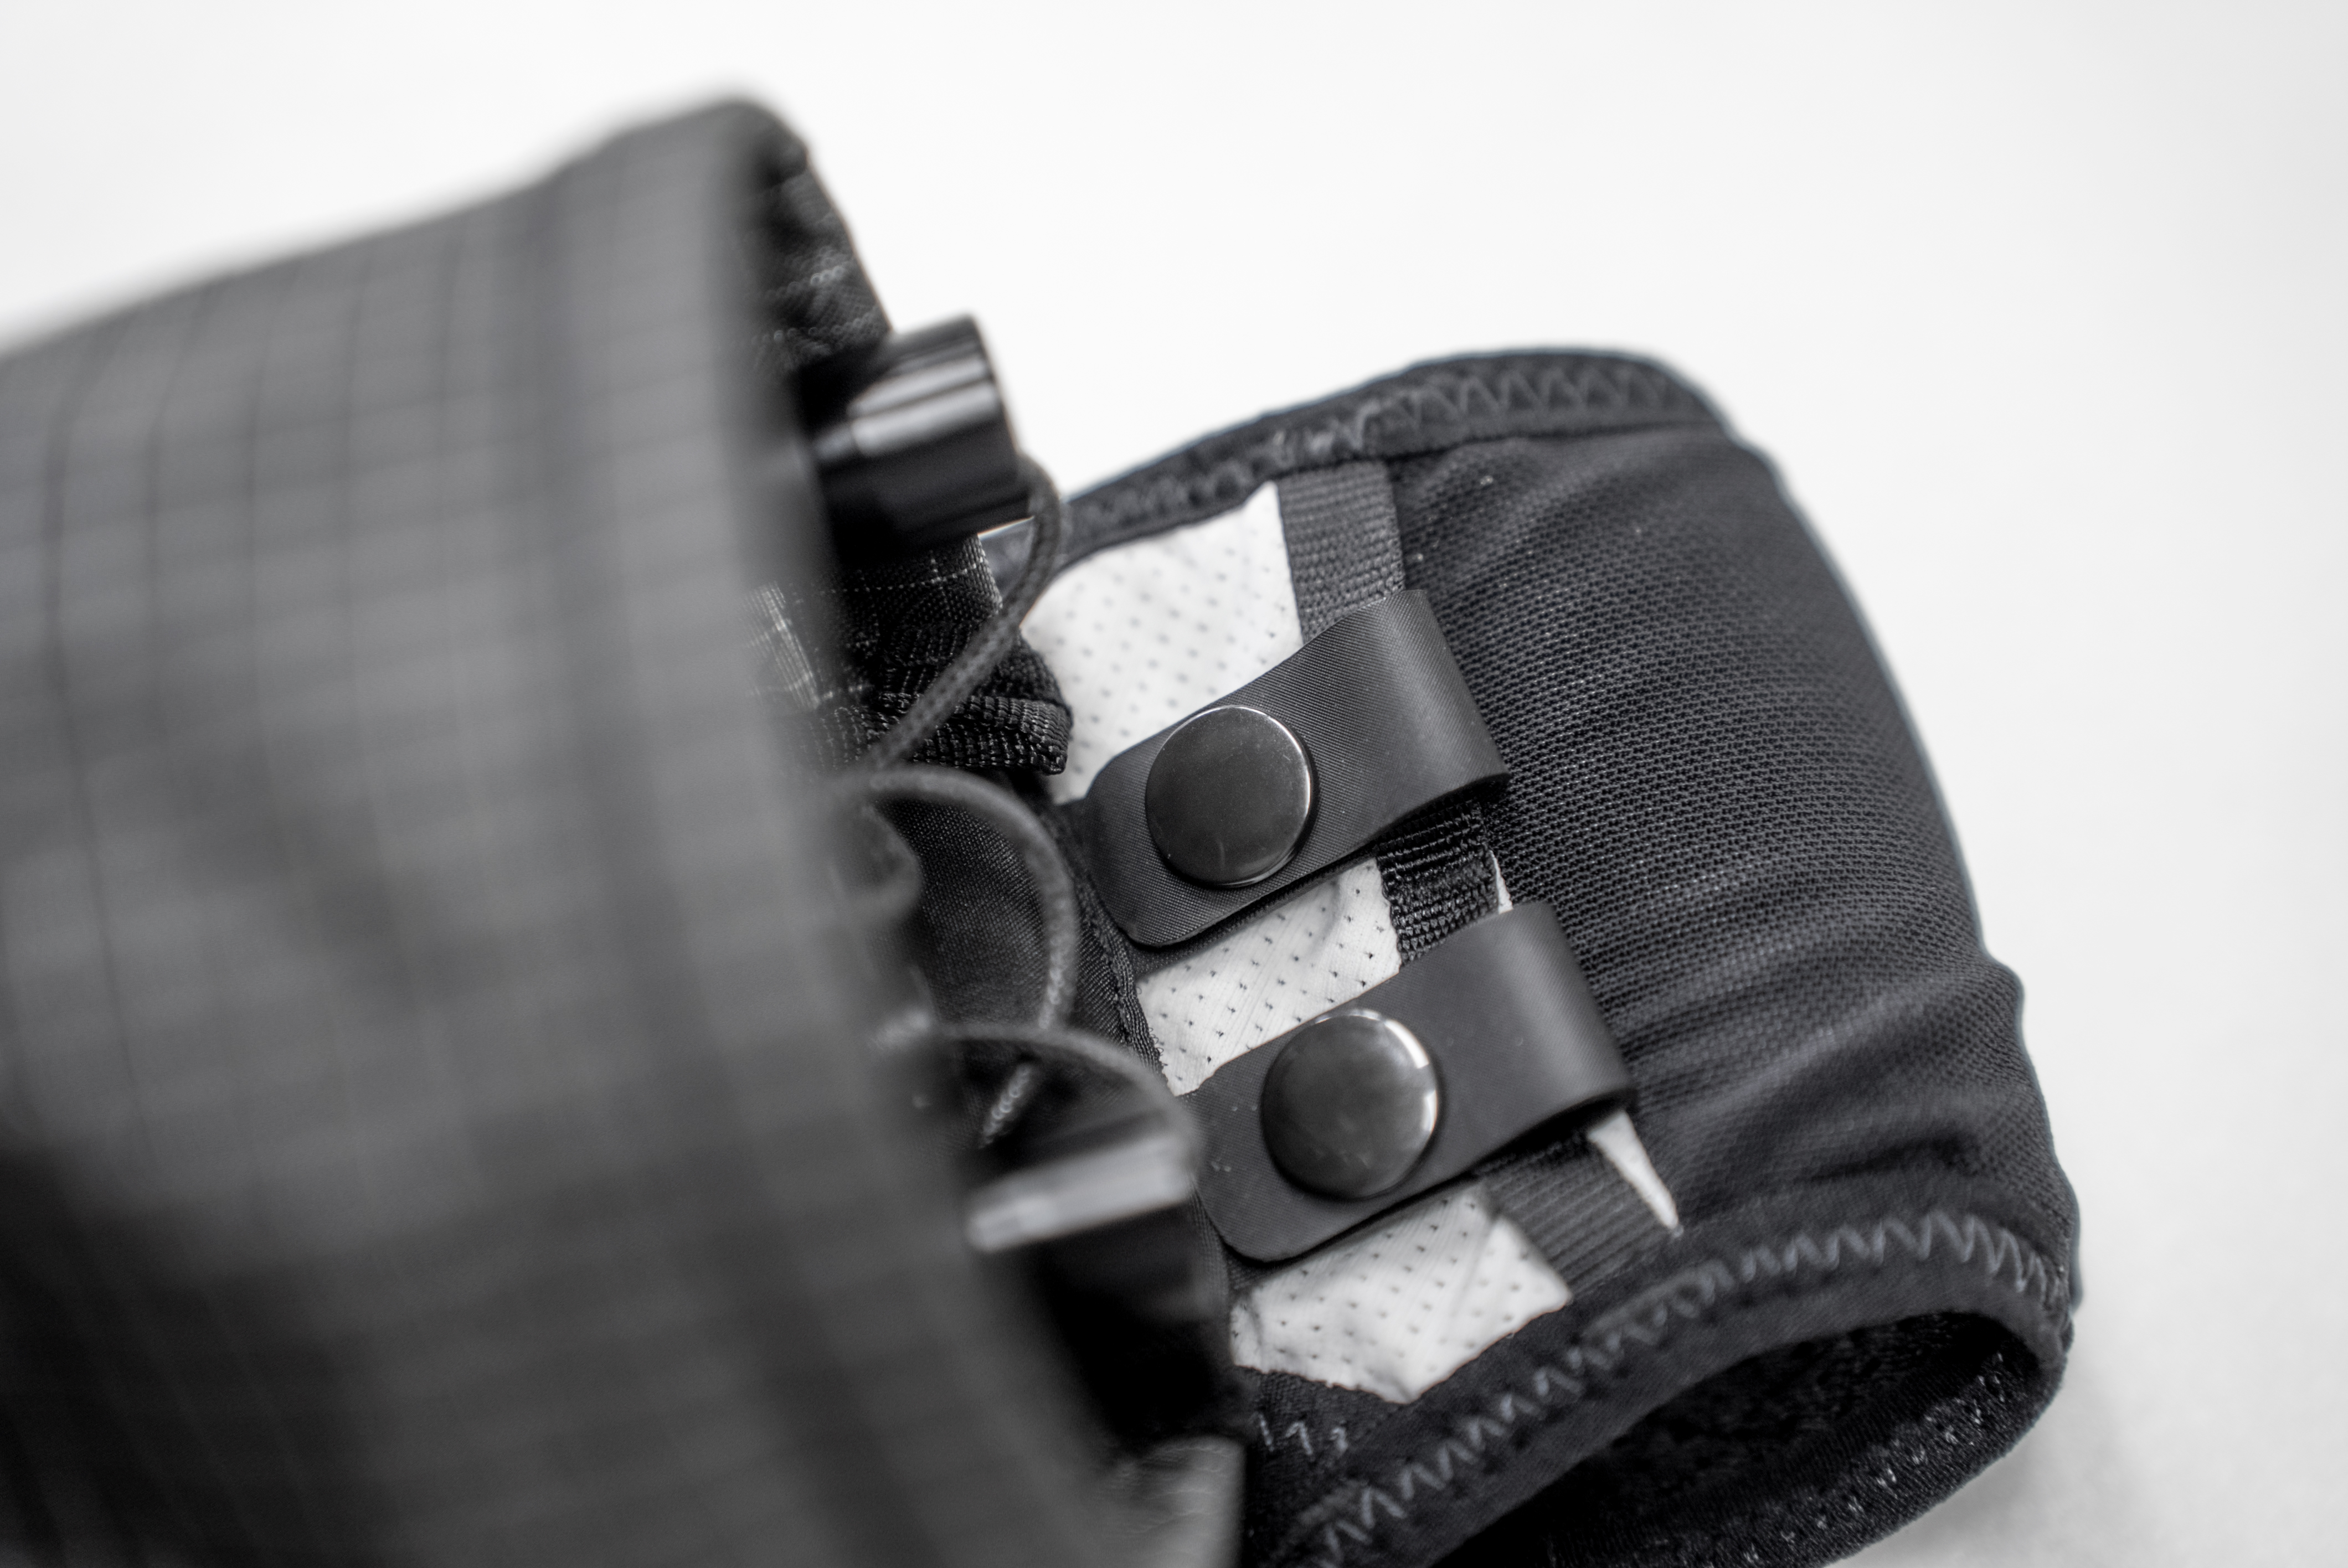
Record attachment location, threading direction, tab width, usable length and closed orientation. If installation requires an empty pack, make that part of the instructions instead of leaving the user to discover it with a packed vest.
After connecting the quiver, check whether the sleeve twists and whether lower positioning conflicts with the upper connection. Review the fastener, attachment loop and supporting panel together. Pulling one snap is not approval of the whole assembly.
04
What do bottom holes tell you?
The bottom photograph establishes visible holes, edge wrapping and cord placement. It cannot establish drainage speed, abrasion life or bottom-panel composition.
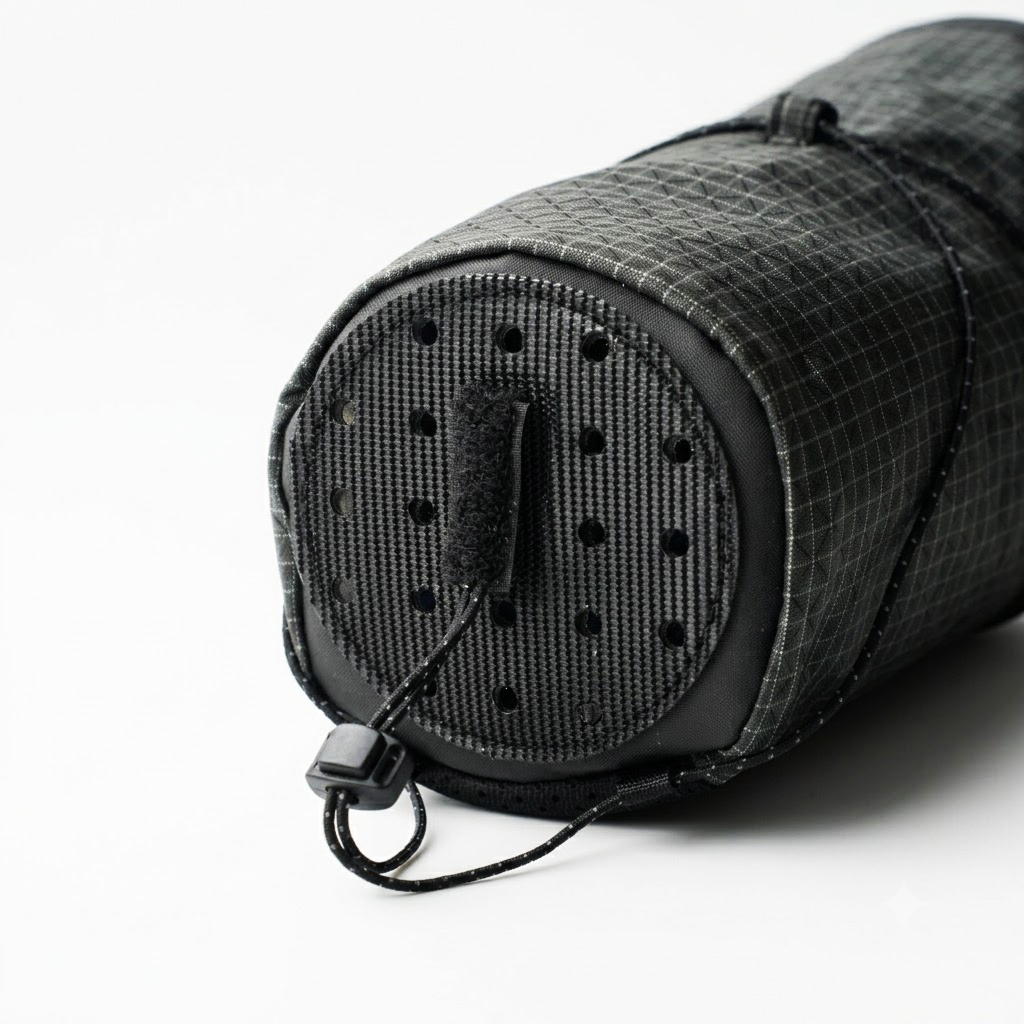
If drainage is a design objective, check the final bottom assembly with the poles inside. The bundle can cover part of the available path, and debris can change it. Include a way to inspect and remove residue in the maintenance brief.
Review pole-tip contact separately. State whether covers are required, where contact occurs and which panel or seam receives repeated pressure. Do not claim puncture protection or unrestricted insertion orientation without corresponding evidence.
05
How should lightweight materials support maintenance?
The sleeve body needs appropriate folding behavior and contact resistance. The bottom needs an appropriate contact and cleaning arrangement. Attachment tabs need to thread and close as intended. These are more useful specifications than calling the entire product “ripstop fabric.”
A visible grid does not establish fiber identity, fabric reference or tear performance. Request the actual material information for each region, including composition, mass per area, coating and relevant evidence where performance claims are required.
Care instructions must match the final assembly. A coating, support layer or fastener may require a different approach from another quiver. Have the supplier identify suitable cleaning and drying methods, then check their practicality with a sample.
06
What should the worn review include?
Document the pack, poles and review movements
Use the target pack, clothing and pole set. Observe standing clearance, raised arms, head movement and the intended retrieval motion. A claim about bounce needs a recorded dynamic review; a woodland photograph cannot provide that result.
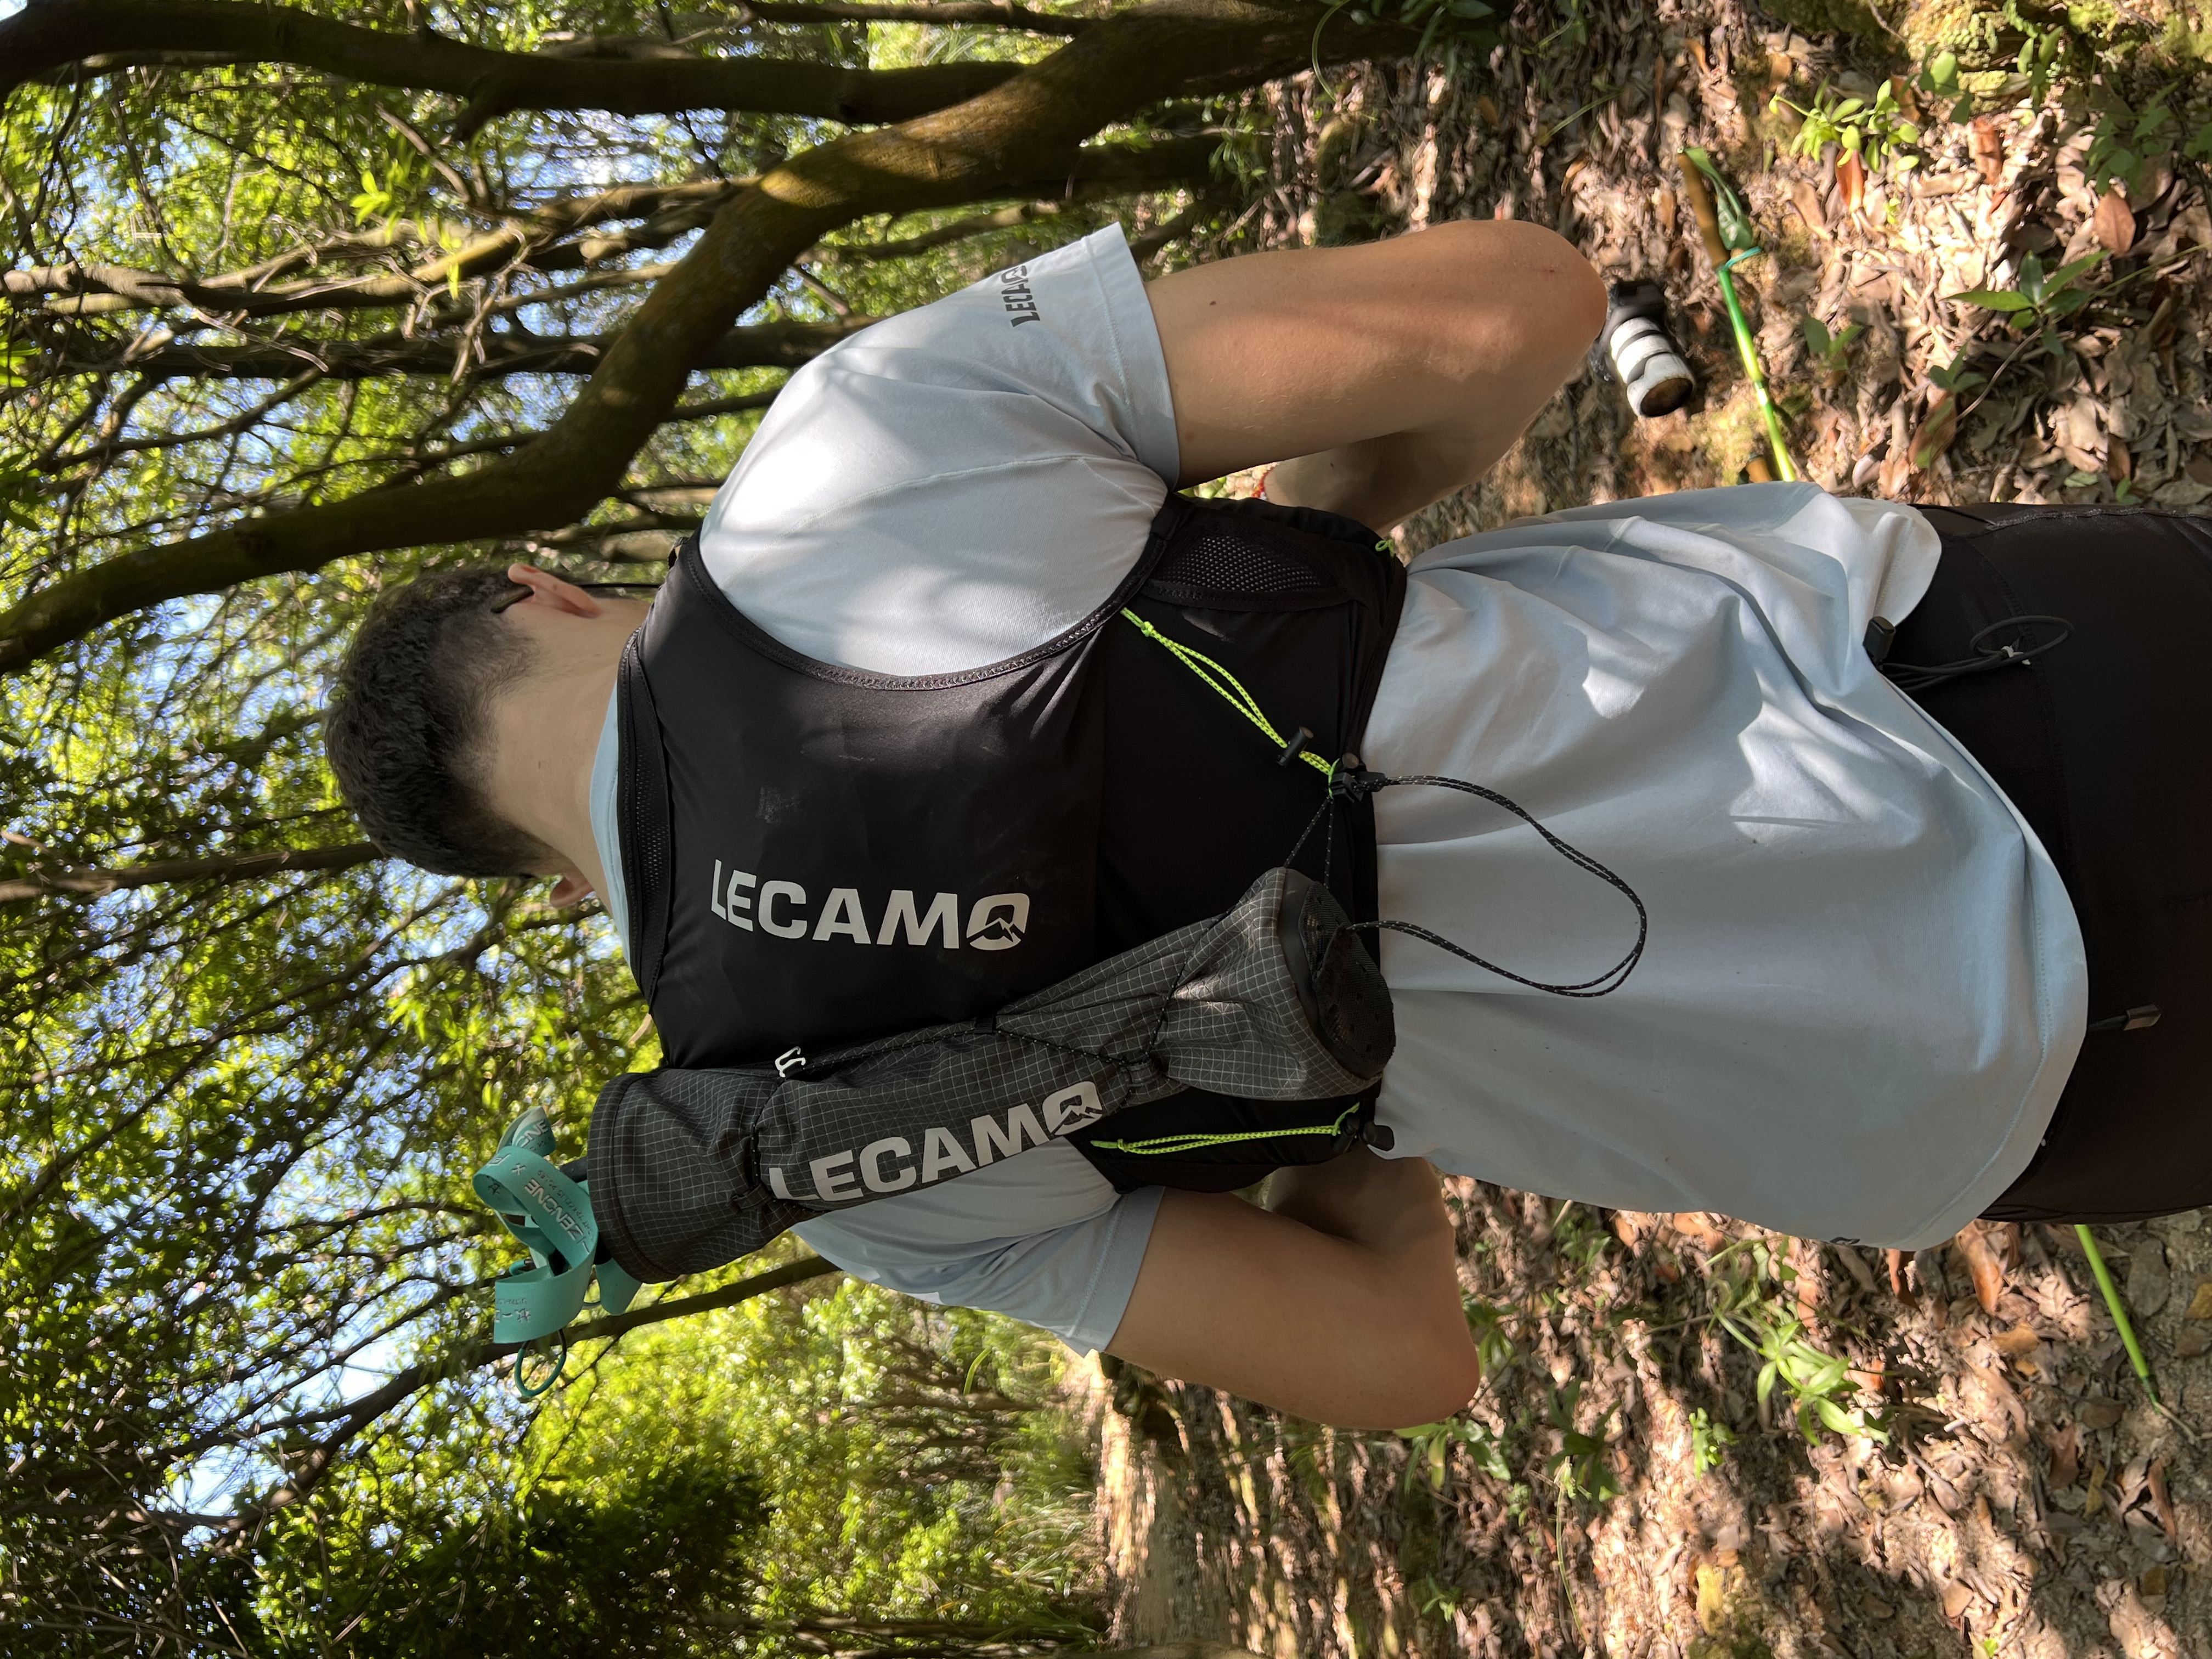
An OEM brief should identify the pack and pole set, insertion orientation, connection method, bottom maintenance requirements and worn-review movements. If reuse across packs is an objective, list the additional pack models explicitly. Submit interface photographs and pole information through the JKPD project inquiry page.
Related review: Trekking-pole attachment and reach. See the JK-096 product reference for the photographed design.
Discuss your bag development project
ANSON XIE
General Manager & Founder
Quanzhou Junkai Pengda Special Equipment Co., Ltd.
Email: ansonxie@jkpdtime.com
Phone: +86 177 5095 3355
WhatsApp: +86 177 5095 3355
Factory address: Floors 2–4, Building 1, Phase I, Huixin Intelligent Manufacturing Industrial Park, Hui'an County, Quanzhou, Fujian, China