
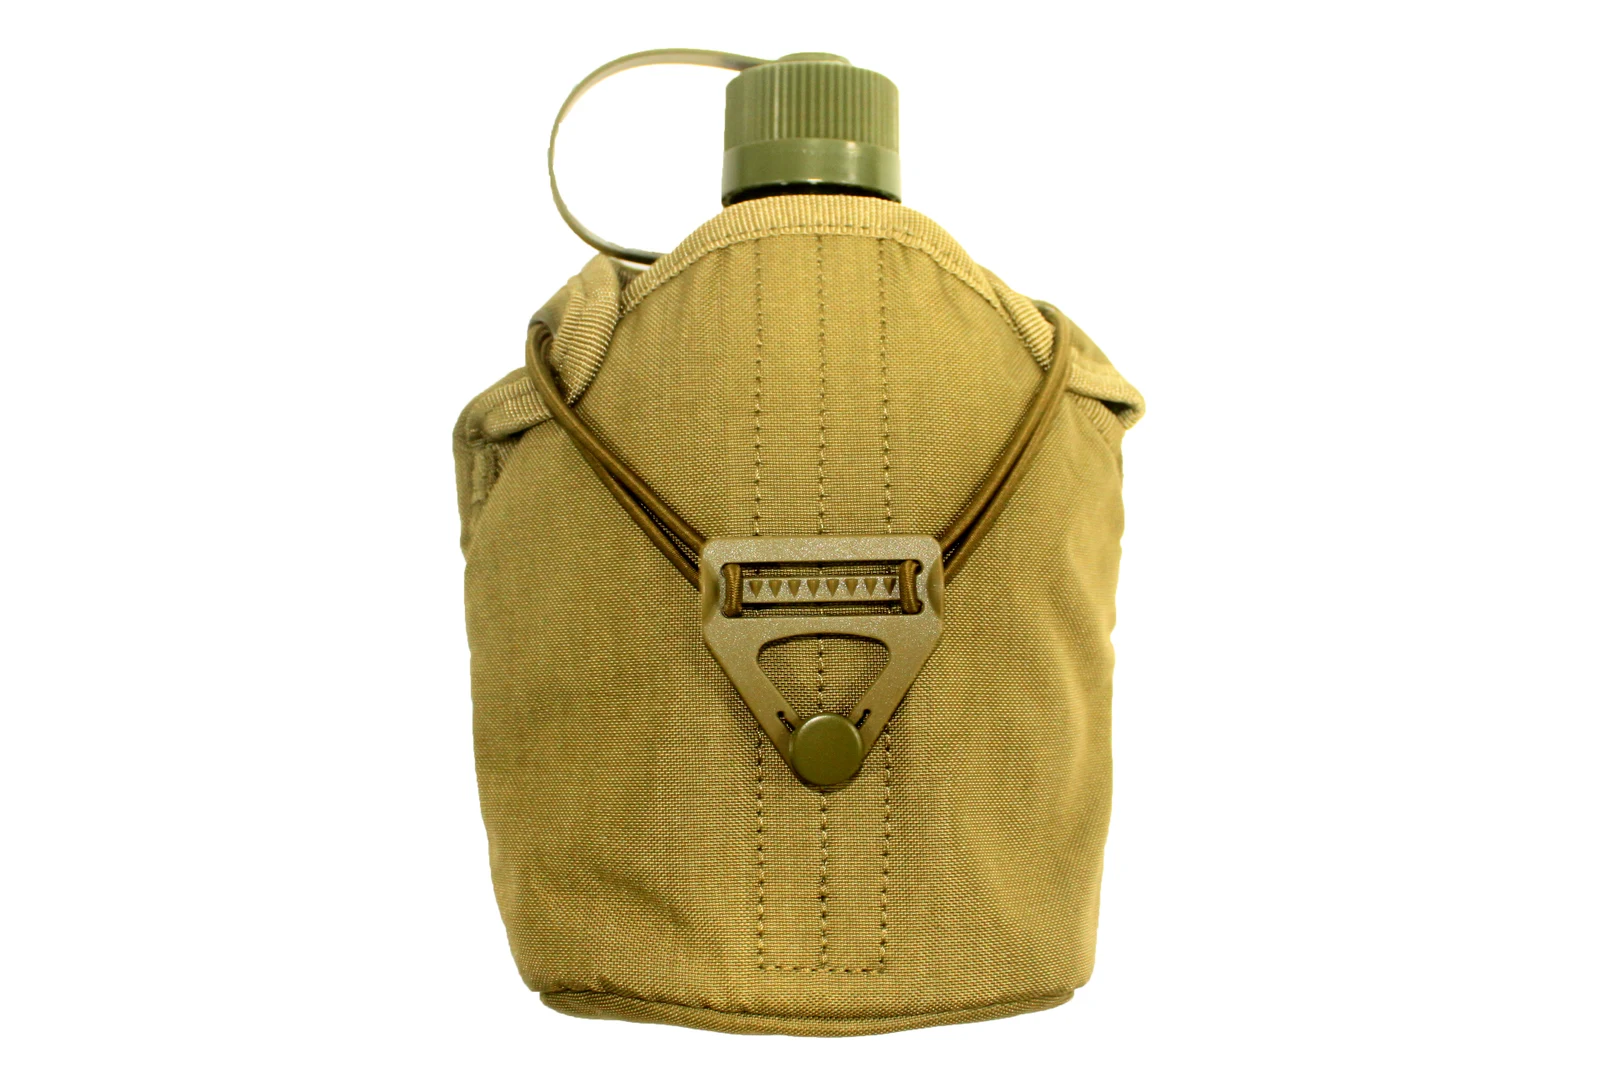
Develop a canteen pouch around the complete rigid container, including its shoulders and cap. Capacity alone does not define the shape that must pass through the opening. The useful specification combines a particular container, its intended orientation and a clear removal and reinsertion sequence.
Development priorities: identify the rigid container; separate cap access from full removal; review reinsertion into the empty pouch; distinguish a bottom opening from whole-pouch waterproofing.
01
Establish a physical container reference
Record the widest body section, depth, shoulder transition, cap and projecting cap-retaining loop. One diameter is insufficient for a flattened or irregular shape. Provide front, side and bottom photographs with the intended insertion direction.
The loaded photograph shows a cap above the pouch opening and a fitting and cord at the front. It records one visible arrangement. It does not establish universal fit, container capacity, fabric composition or insulation performance.
Keep the actual container with the development sample where possible. If a substitute object is necessary, identify which dimensions and projections it reproduces. A smooth block may represent the main body but fail to reproduce the cap loop that causes an access problem.
02
Decide whether the canteen stays in the pouch
For opening the cap with the container retained, examine finger clearance, cap rotation and movement of the retaining loop. For full removal, concentrate on the shoulder passing through the opening and whether the other hand must steady the pouch.
These are separate workflows. State the primary one before fixing the coverage height and retention arrangement. Exposing more of the container may help one action while changing the amount of body coverage, so approve the intended compromise on the physical sample.
A review should end after the container has been returned and secured, rather than immediately after removal. Record any release, repositioning and fastening steps. This makes later instructions more useful than a feature claim such as easy access without a defined procedure.
03
Review the empty opening during reinsertion
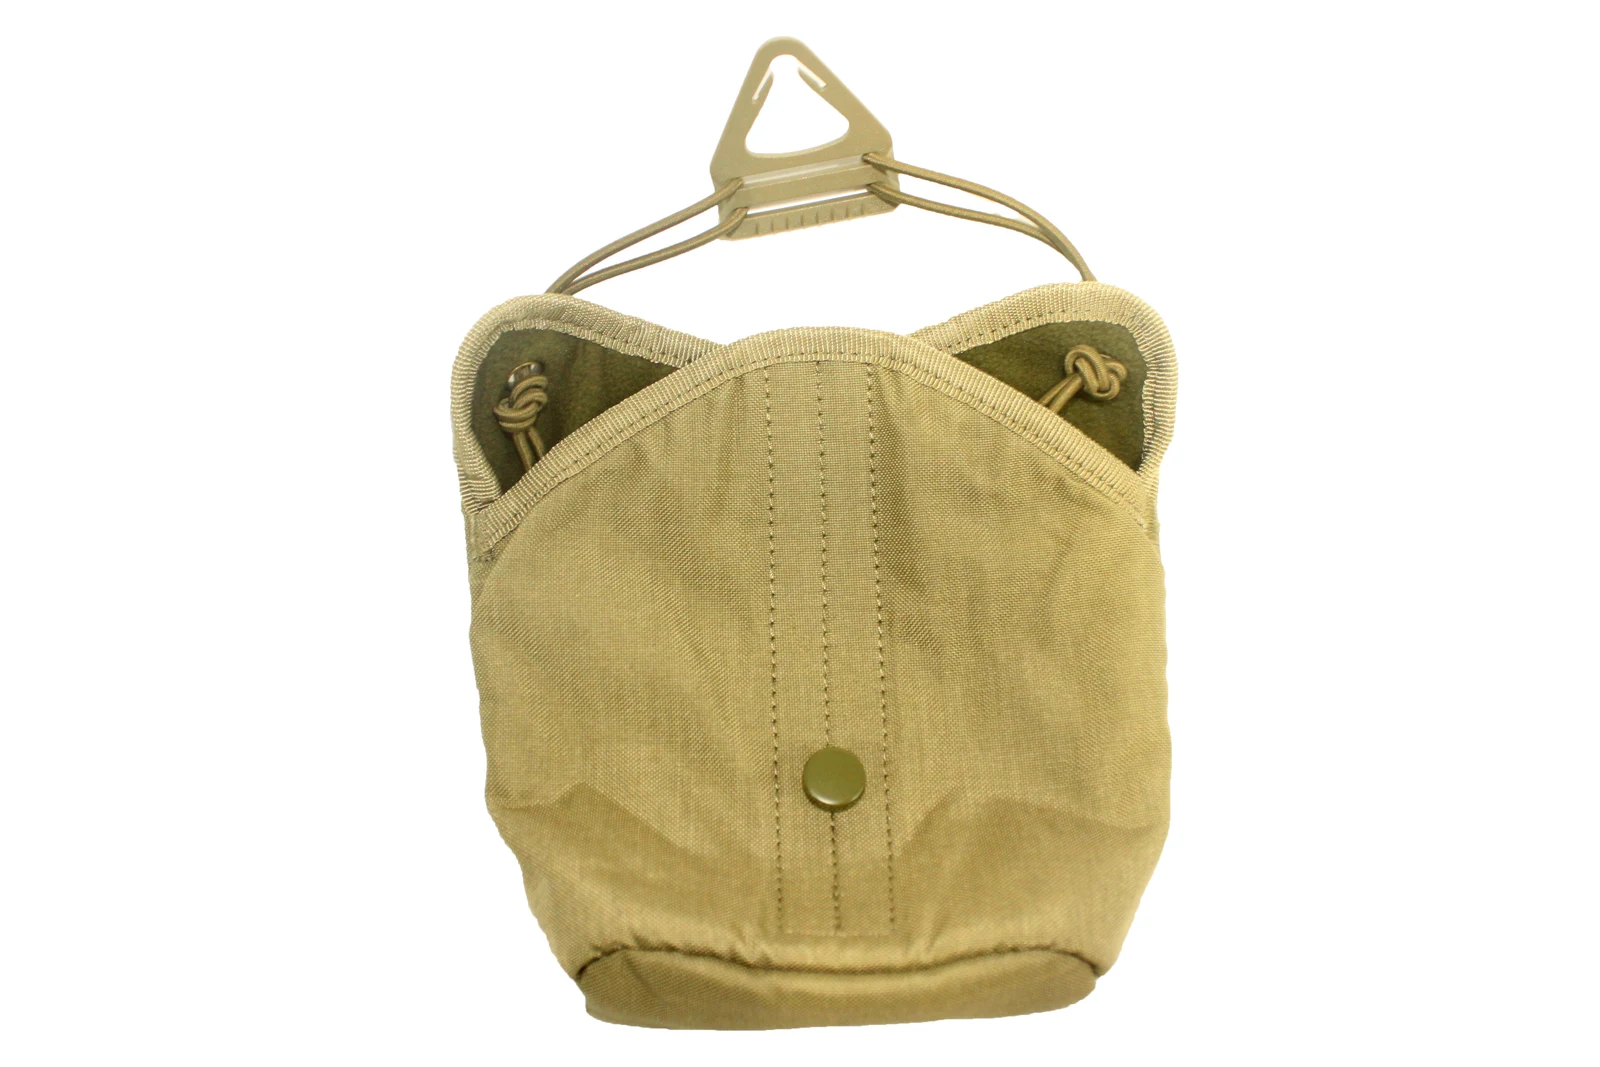
The empty-pouch view shows a curved front edge and openings at the sides. Use these as construction references, then mount the sample in its intended position. Observe whether the container base catches a folded edge or requires the opening to be held apart.
Locate the contact point before changing the pattern. Compare the opening contour, binding stack and side allowance. Enlarging the entire pouch may also add unwanted movement space, so a revision should address the identified obstruction.
Keep the mounting condition consistent when comparing versions. A loose pouch held in the hand behaves differently from one attached to a pack. Record where support is supplied during the demonstration so it is not mistaken for self-supporting opening behaviour.
04
Confirm the position after fastening
After insertion, record shoulder height relative to the opening, front-fitting orientation and any crossing between the cap loop and nearby components. Retention and removal may use different adjustment states. Keep both states in the approval record.
No dynamic retention test is reported here. If resistance to loss or one-handed handling is required, agree the carrying position, filled condition, movements and acceptance criteria for the corresponding sample. Do not infer those results from a loaded still photograph.
05
Interpret the bottom eyelet carefully
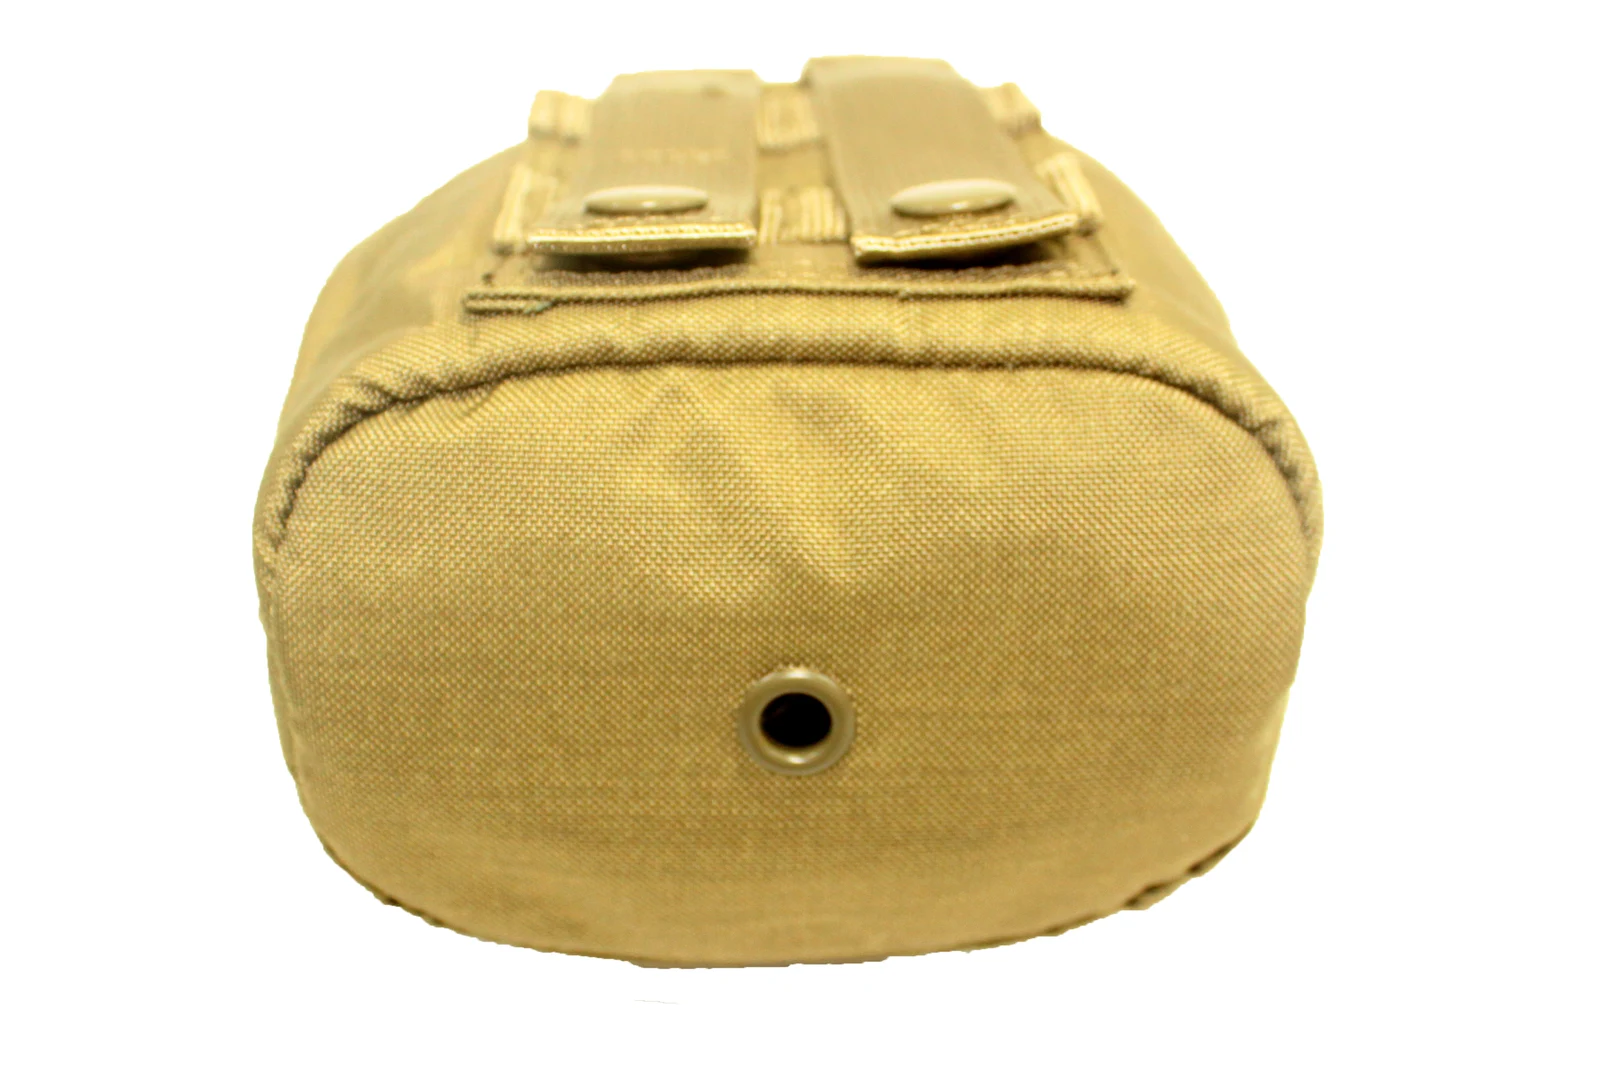
A round bottom eyelet is visible in the photograph. This supports discussion of its location and inspection, but establishes neither drainage rate nor whole-pouch waterproofing. Define whether water needs to leave the assembly and whether dirt can collect around the opening.
Maintenance instructions also need the actual material and component requirements. Do not prescribe cleaning temperatures, chemicals or drying methods from a familiar-looking fabric surface. Keep cleaning guidance tied to the approved assembly documentation.
06
Make compatibility identifiable for procurement
Keep the approved sample identifiable
Hand over the container model or physical reference, insertion direction, primary access workflow, mounting position and sample version together. If several containers are intended, register each confirmed combination rather than relying on a universal-pouch label.
The construction photographs are company-library originals. Continue with the JKPD blog for related product-development discussions.
Related: Detachable interface review. See the photographed product reference.
Discuss your bag development project
ANSON XIE
General Manager & Founder
Quanzhou Junkai Pengda Special Equipment Co., Ltd.
Email: ansonxie@jkpdtime.com
Phone: +86 177 5095 3355
WhatsApp: +86 177 5095 3355
Factory address: Floors 2–4, Building 1, Phase I, Huixin Intelligent Manufacturing Industrial Park, Hui'an County, Quanzhou, Fujian, China