
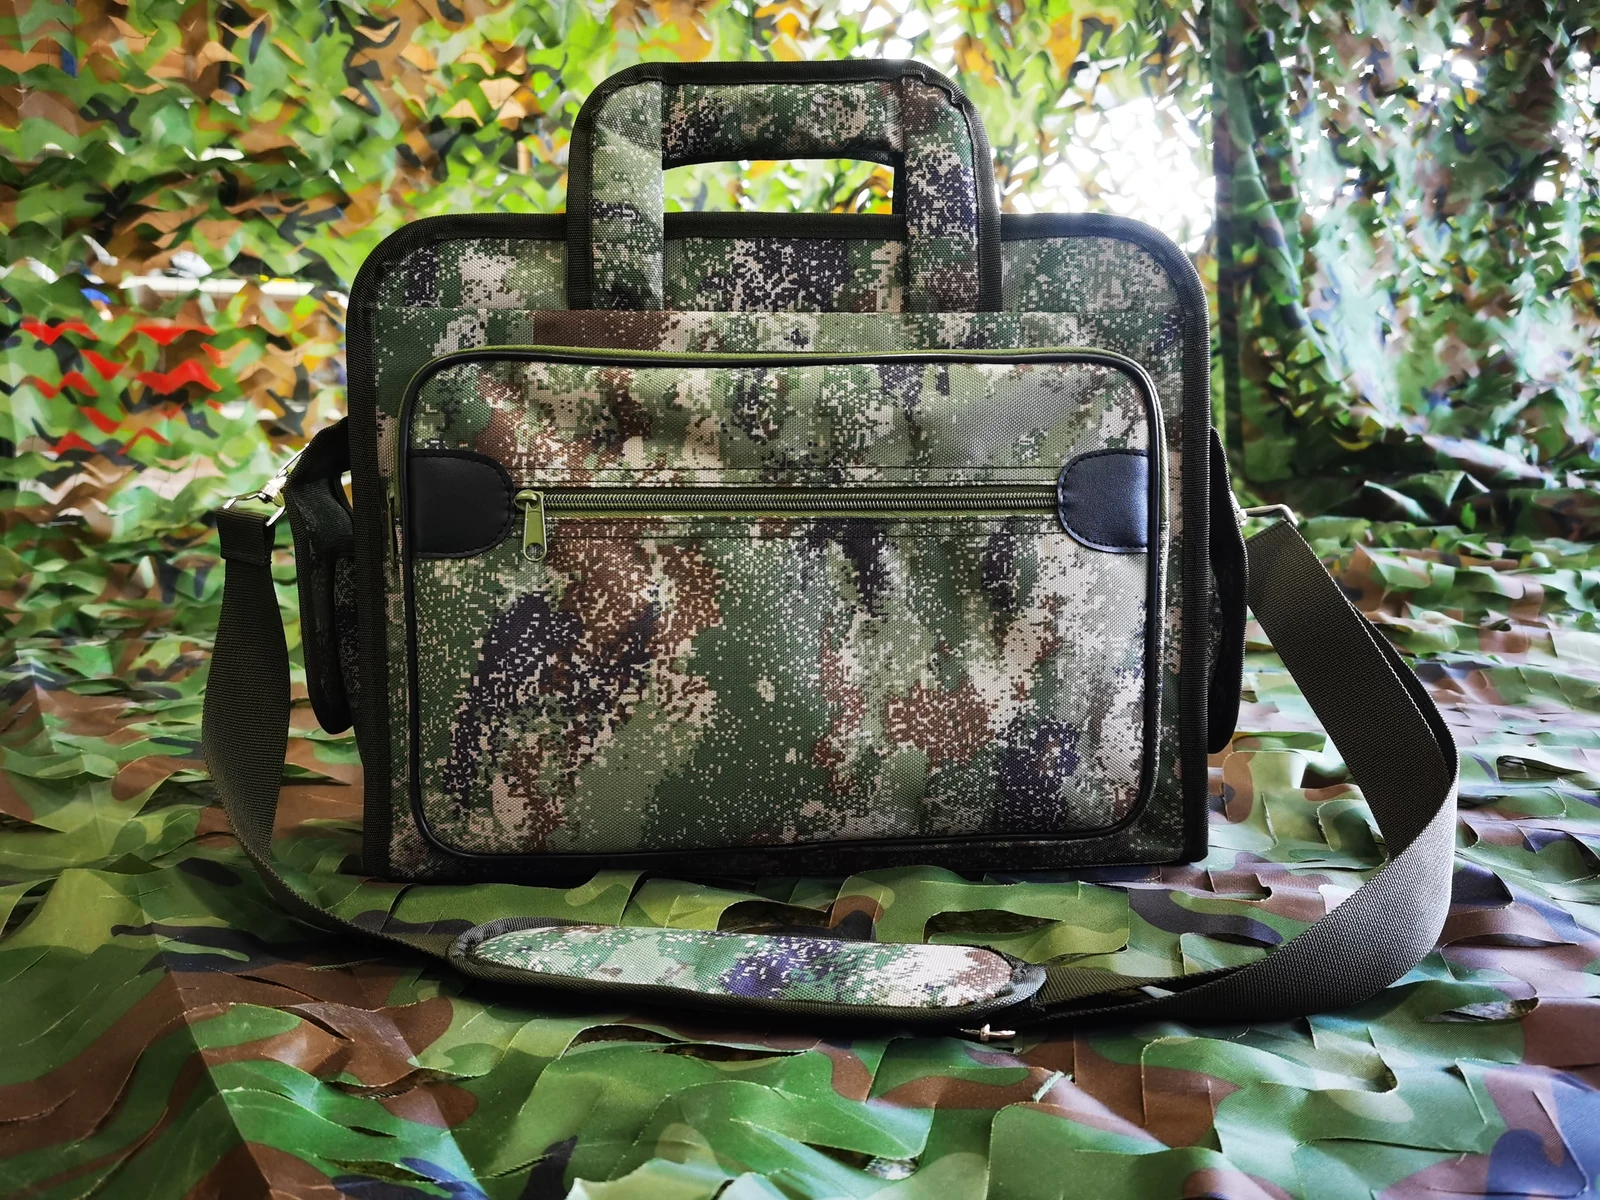
A center divider can establish a useful boundary for files and devices, while a front organizer handles smaller items. Pocket count alone does not describe that arrangement. Thick folders require depth, and filled organizer pockets can change the shape of neighboring spaces. Assign a task before adding another partition.
These company-library photographs show a document-bag sample. The bottom of the center divider is not fully visible, so the article does not describe it as a sealed, independent or protective laptop compartment.
01
Give the main folder a defined position
Specify whether the user carries loose sheets, a covered folder or a filled binder. The same paper format can sit inside very different covers and binding edges. Trying a single sheet does not establish suitability for a thick folder.
Place the principal folder on its intended side before allocating devices and accessories. Frequently used documents need an identifiable upper edge and removal path. Loose items in the middle should not require clearing away every time a file is needed. That objective does not necessarily require rigid compartments.
02
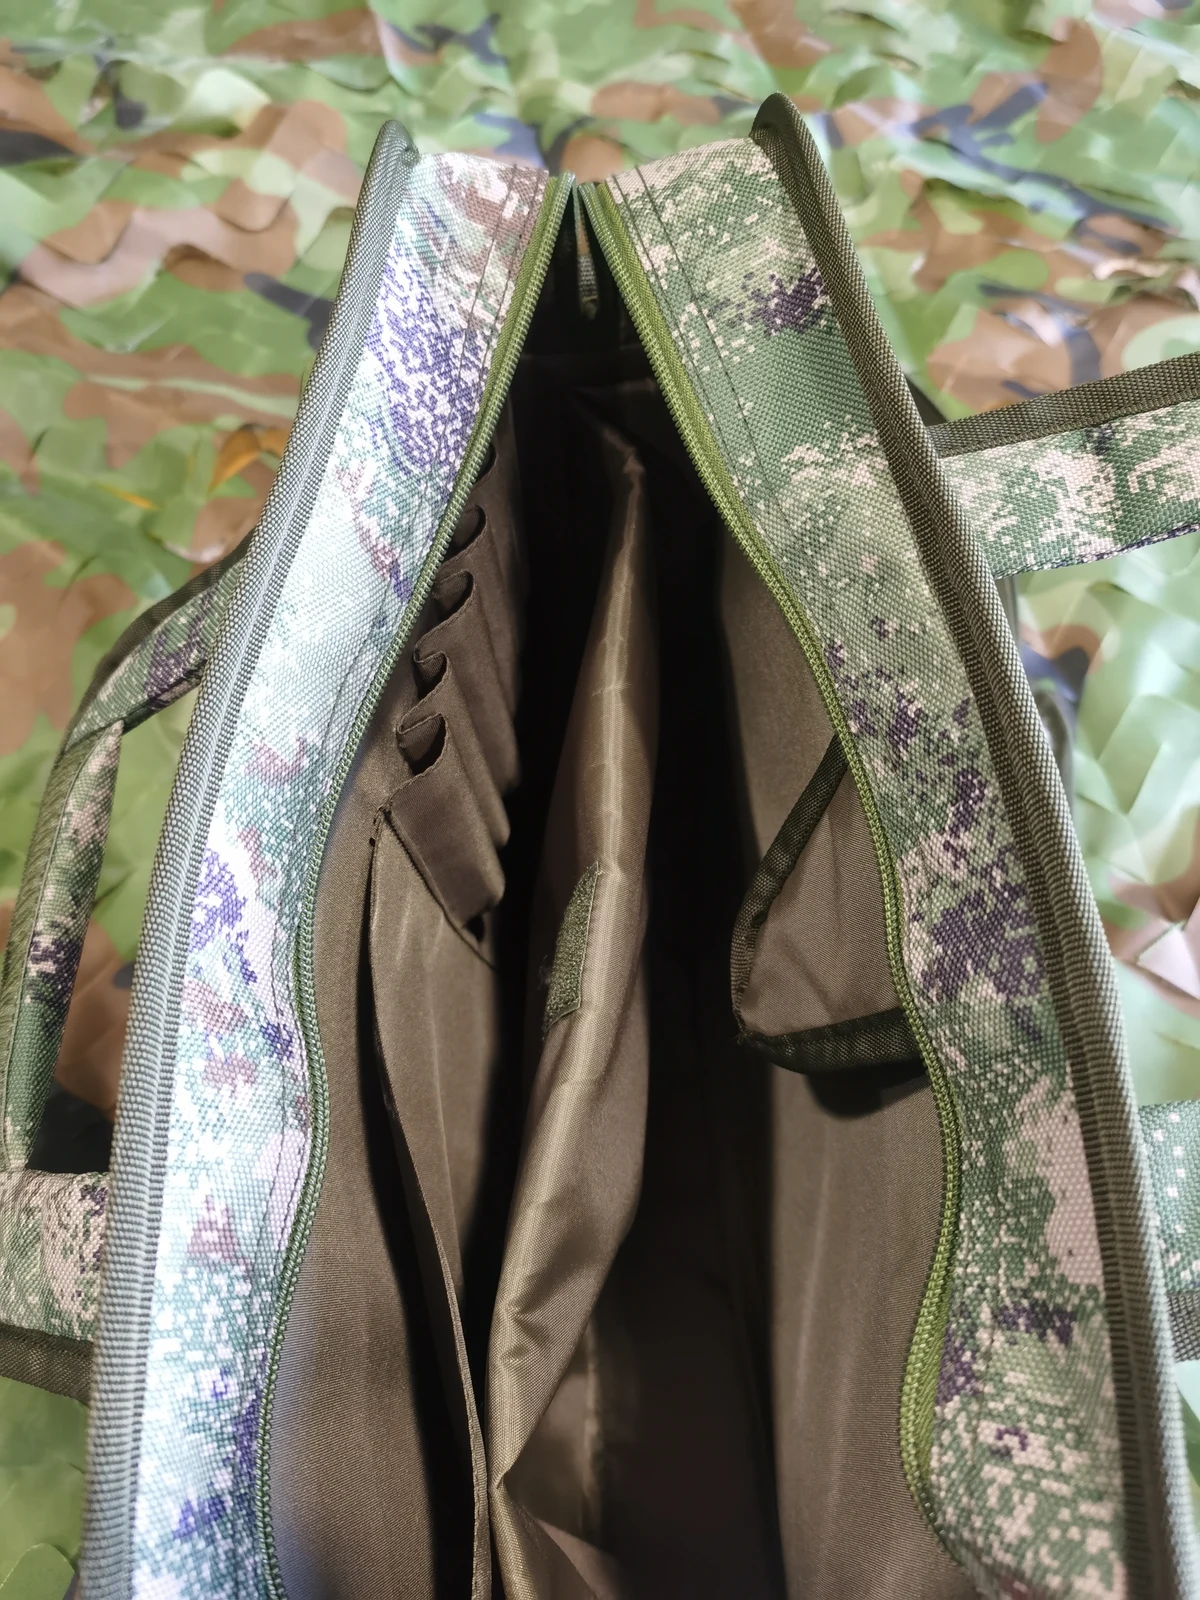
An open divider is a boundary, not a separate compartment
The photograph shows a divider edge inside the main opening and space on either side. It provides a reference for allocation, without establishing whether its bottom and ends are closed. Its internal materials also cannot be identified from this view.
Mark the upper edge, end attachments and bottom treatment separately in the drawing. If small objects must stay on one side, confirm those boundaries explicitly. For large files, a simpler open division may be sufficient. The intended organization should determine whether a closed bottom is necessary.
03
Allocate depth as well as width
A flexible divider can move as contents change. A thick folder on one side may reduce room on the other. Approving both sides against their maximum empty shape can therefore give an unrealistic impression of simultaneous capacity.
Ask for one reference set that will be carried together, including any device sleeve. Use that set to discuss total compartment depth, divider position and opening allowance. The external bag dimensions are not the independent usable dimensions of each side. Flexibility is not unlimited extra space.
04
Keep small-item organization outside the file path
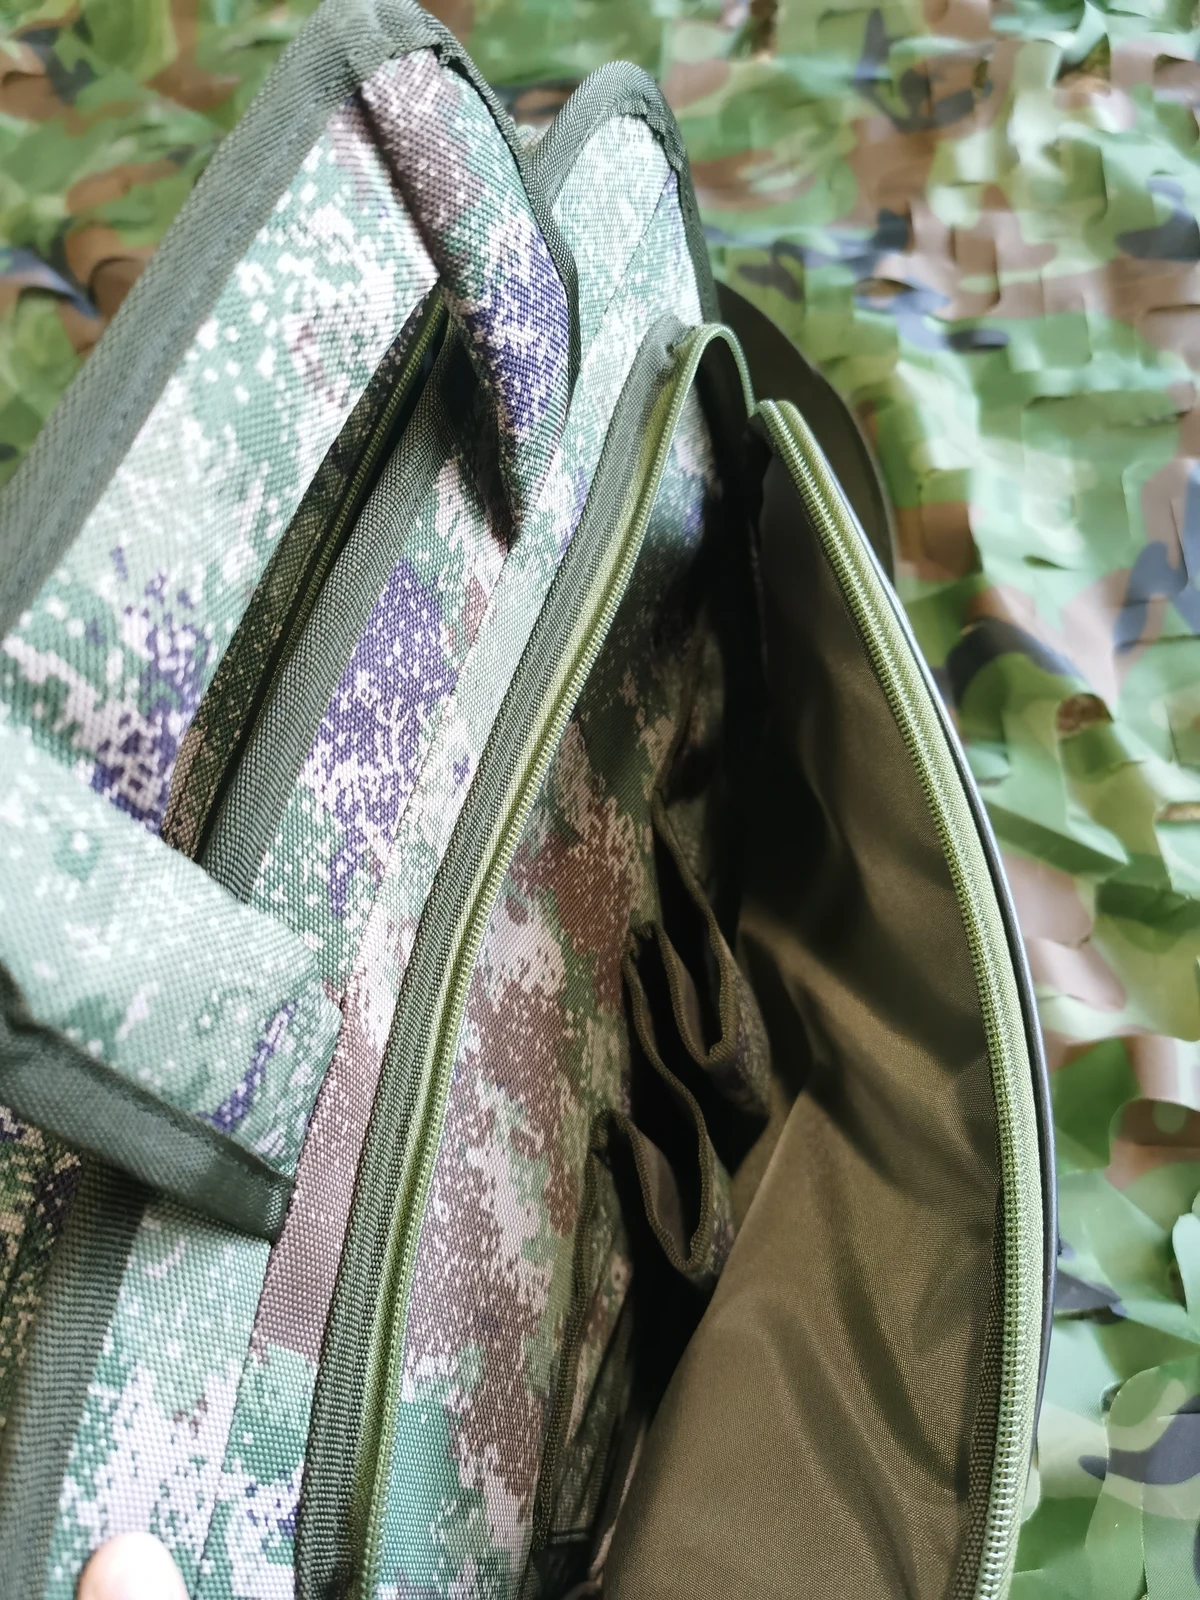
The open front organizer shows several slip pockets. Use it to decide which items should leave the main folder route. Allocate actual pens, cards or cables by their project-specific shape, then check the resulting closed profile.
A thick power accessory placed in a pocket intended for flat items may require a different pocket depth or location. That is a space-allocation decision. The photograph does not establish that any pocket fits a particular charger or that a filled organizer cannot press against the main compartment.
05
Review removal with the other contents still present
Leave the reference load in place and remove only the target folder. Observe whether its cover must work around the divider, whether fingers need a narrow gap and whether loose contents enter the space after removal.
Use those observations to revise the layout. They are not durability or device-protection evidence. If the normal task involves opening the bag on a desk, review that posture rather than relying on a tidy hand-held display of the empty interior.
06
Make the allocation explicit in the purchasing brief
Record what the approved sample must show
Identify the main files, devices and small items on a layout drawing and attach their reference outlines. State which divider edges are joined and which remain open. This prevents “center divider” from becoming shorthand for an independent device compartment.
As a terminology reference, the official TOM BIHN Daylight Briefcase description lists an open-top interior pocket separately from its front zippered pockets. This illustrates naming different access roles; it does not identify the construction or fit of the pictured sample. Share your intended load and allocation through the JKPD project page.
More product development resources: JKPD Blog.
Discuss your bag development project
ANSON XIE
General Manager & Founder
Quanzhou Junkai Pengda Special Equipment Co., Ltd.
Email: ansonxie@jkpdtime.com
Phone: +86 177 5095 3355
WhatsApp: +86 177 5095 3355
Factory address: Floors 2–4, Building 1, Phase I, Huixin Intelligent Manufacturing Industrial Park, Hui'an County, Quanzhou, Fujian, China