
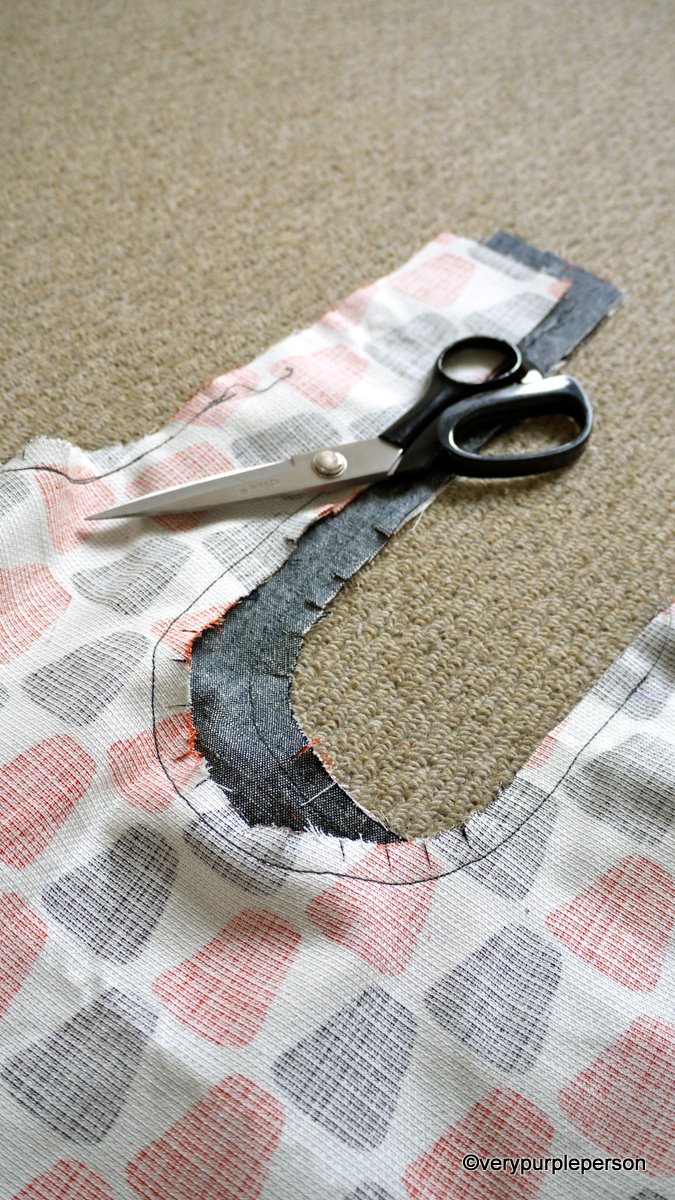
Photo: verypurpleperson. CC BY 2.0 · Original source. Unmodified for this article. The photograph remains under its stated license; no endorsement, specific material grade or JKPD use is implied.

01
Identify the affected curve first
When a curved pocket, side panel or turned component pulls or bunches, identify the layer and allowance section responsible. The presence of a curve is not a reason to cut every allowance more deeply.
Concave and convex curves have different material requirements after turning. This guide concerns sampling decisions for release and bulk reduction. It does not prescribe one clipping depth or spacing for every fabric. Start with the actual geometry and construction rather than copying a cutting pattern from an unrelated product.
02
Distinguish release cuts from material removal
Simplicity’s published sewing tips distinguish snips on inward curves from wedge-shaped notches on outward curves. A WeAllSew hat example separately demonstrates concave-edge clipping while protecting stitching. These explain principles; garment dimensions and settings are not bag specifications.
The photograph shows clips in an inward-curving allowance, nearby stitching and scissors. The photographer’s visible credit is retained. It is not an engineering requirement for a bag model, and a safe cutting depth cannot be measured from this uncalibrated image.
03
Check the seam before cutting
Compare pattern seam lengths, registration points and allowance width. Confirm that unintended fullness has not been sewn into the join. Extra clipping may not correct an outline already affected by positioning or feeding errors.
Build a local sample using the actual radius. Label fabric direction, inside and outside layers, and turning direction. A temporarily enlarged curve may be easier to sew but does not represent the difficult part of the final product. Preserve the reference marks so differences between samples can be located rather than described only as more or less smooth.
04
Define treatment for the material stack
Thin lining, thick shell, laminates and reinforcement should not automatically receive the same cuts. Identify the layer and side needing release, and examine whether treatment leaves an edge prone to fraying or further tearing.
Cutting as close as possible to the stitch line is not an objective. Preserve the joining stitches and inspect adjacent material. Agree any support, trimming and later edge finish for the project, first verifying them on a coupon. Record the treated layers so a later operator does not reproduce the visible cuts in every layer indiscriminately.
05
Review both the turned profile and the inside
After turning, inspect contour, local pull marks, lumps and symmetry, then inspect the cuts for damaged stitches or unexpected splitting. An improved outline does not by itself establish a satisfactory connection.
Preserve intended padding or lining and review the component in its planned state. If only one location remains problematic, record its geometry and layers rather than extending treatment everywhere. Photographs support the appearance discussion, while the retained local sample allows the inside condition to be examined directly.
06
Keep before-and-after evidence
Keep the sample and its record together
Retain samples and photographs before treatment, after treatment and after turning. Record the implemented area, tool and operation sequence. Change variables for a stated reason and recheck both profile and connection instead of replacing pattern, fabric and cutting method together.
Define repeated flexing, intended-care or connection checks appropriate to the application. This article supplies no test counts, measured performance or JKPD experimental findings. A clear sequence of local samples helps the development team explain which change affected the result.
07
Specify treatment by location
Link treatment areas to panel identifiers, curve direction, layers and joining-line position, including areas that must remain untreated. Use the approved sample to define the expected completed shape and inspection method. A general instruction to clip curved areas leaves too much unresolved.
This handover helps procurement understand the proposed operation and gives the maker a basis for reviewing material changes. Keep the local construction sample with the final component so future revisions can compare the hidden allowance treatment as well as the visible outline.
Share your application, candidate components and sample requirements through the JKPD project inquiry page.
Discuss your bag development project
ANSON XIE
General Manager & Founder
Quanzhou Junkai Pengda Special Equipment Co., Ltd.
Email: ansonxie@jkpdtime.com
Phone: +86 177 5095 3355
WhatsApp: +86 177 5095 3355
Factory address: Floors 2–4, Building 1, Phase I, Huixin Intelligent Manufacturing Industrial Park, Hui'an County, Quanzhou, Fujian, China